

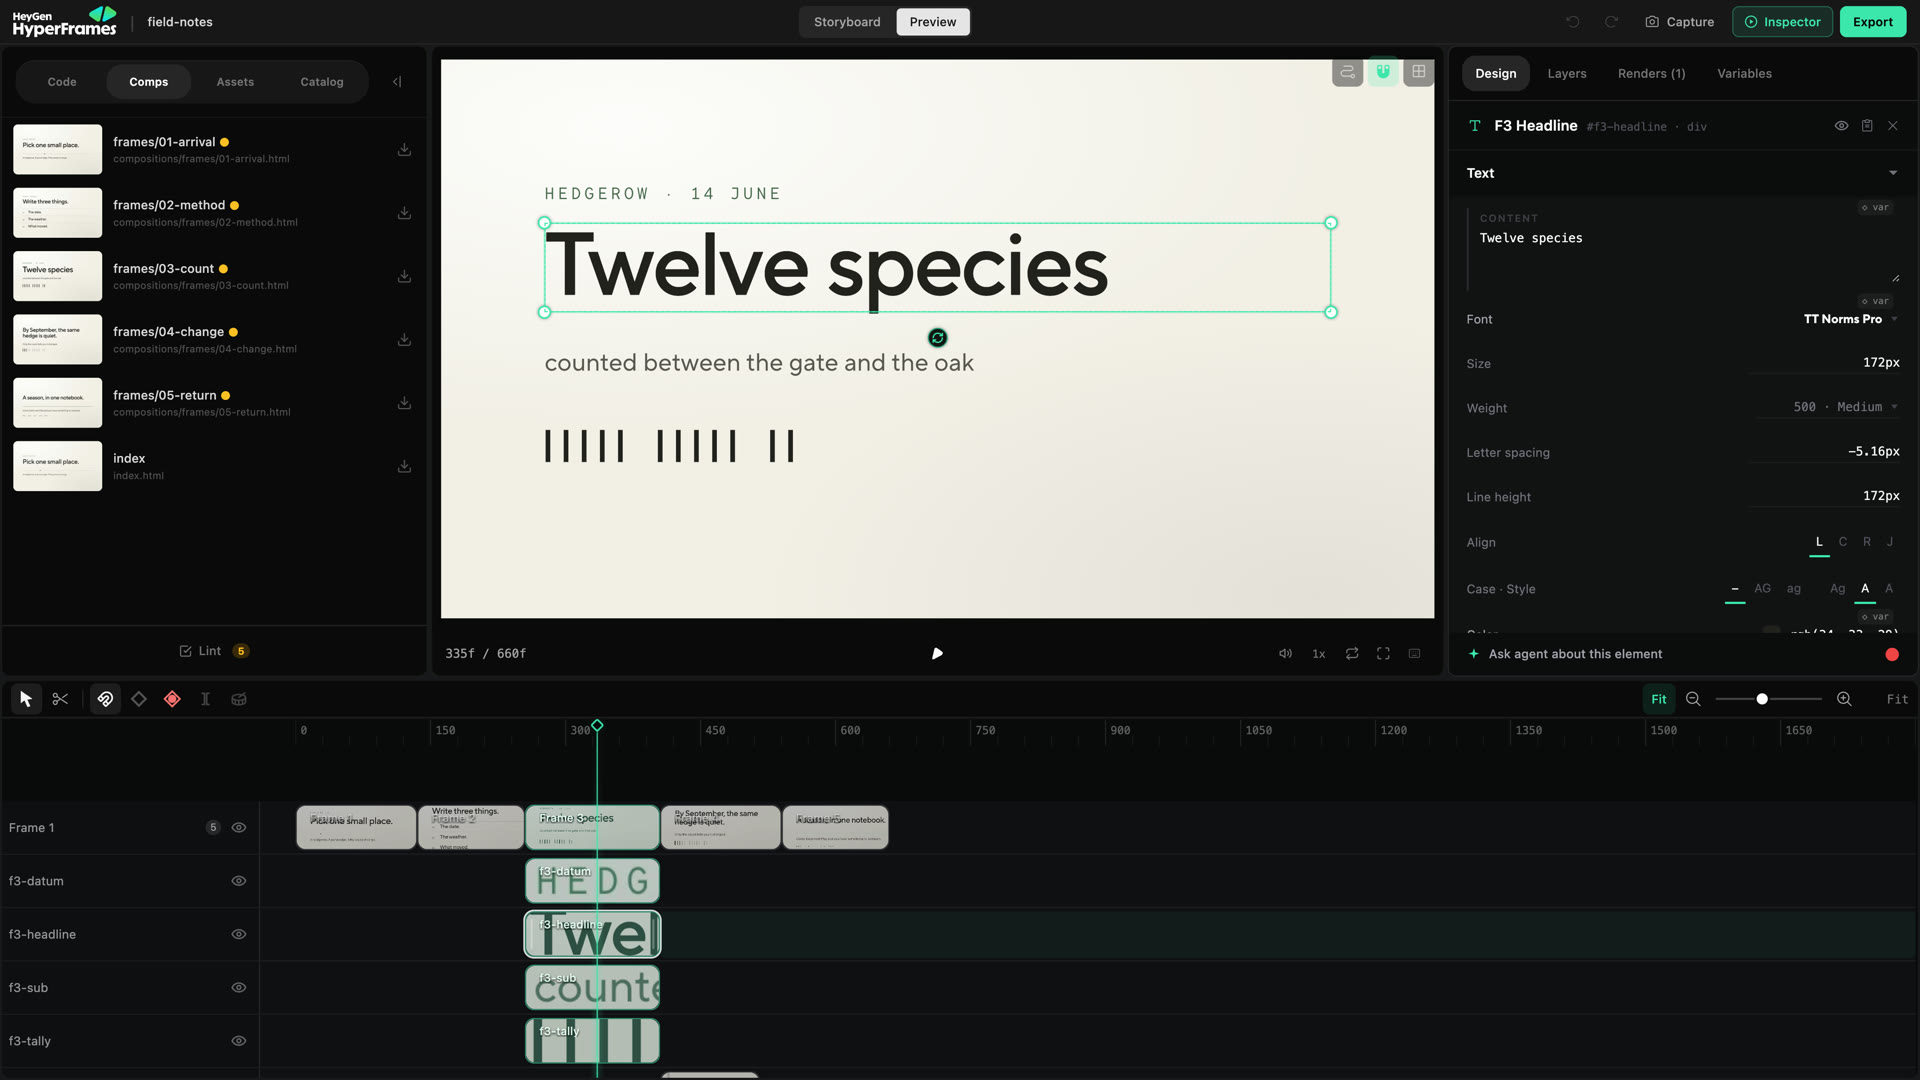
A selected headline exposes canvas handles and the Design controls that apply to it.
1. Pause where the element is visible
Move the playhead to a frame where you can judge the element and its surroundings. If it enters or exits, pause after the movement has settled. Click the element on the canvas. When the wrong item is selected, open Inspector → Layers and choose it there. Layers is also the reliable way to find something that is hidden, outside the frame, or inside a group. The selection stays connected across the canvas, Inspector, and timeline.2. Change only what is wrong
Use the canvas for spatial edits:- drag inside the selection to move it;
- drag a handle to resize it;
- use the rotation control for supported elements;
- crop an image or video to change the visible area without moving its box;
- use arrow keys for a small nudge;
- watch the guides when the element snaps to the frame or another element.
Do not change content, layout, style, timing, and motion at once. Make one kind
of edit, play it, then decide whether another edit is still needed.
3. Work with overlaps and groups
Layers shows the visual structure of the current composition. Dragging a layer changes its stacking order when the wrong item covers another. Timeline tracks organize time; they are not automatically the same as visual stacking order. Group elements that should move and remain organized together. Use Command/Ctrl + G to group and Command/Ctrl + Shift + G to ungroup. A nested composition is a reusable scene inside another composition. Open the nested composition when the change should affect that scene itself. Stay in the parent when you only need to change where or when the scene appears.4. Decide whether the edit should animate
Auto-keyframe starts enabled in the timeline toolbar.- Turn it off for a correction that should stay constant for the clip.
- Leave it on when changing the property at the current playhead time should create motion.
5. Replace media without breaking the scene
Select the image, video, or audio element and replace its source from Media or Assets. Then check:- crop and fit;
- visible duration;
- playback start, rate, loop, and volume when those controls apply;
- the transition into and out of the clip.
6. Play the result, not just the frame
Play from before the edit until after it. Check that:- the element stays readable at the final output size;
- it does not cross or cover another important element;
- its entrance and exit still work;
- text remains readable over every background it crosses;
- undo returns the project to the expected state if the change was wrong.
When Studio cannot edit it safely
Some generated, nested, or source-controlled elements do not expose every property for direct editing. In order:- select the exact parent or child in Layers;
- open the nested composition;
- check whether Design exposes the property;
- use Ask agent or copy the selected context;
- edit the source only when you understand the project structure.